Warning: preg_replace(): The /e modifier is deprecated, use preg_replace_callback instead in ..../includes/class_bbcode.php on line 2958

Warning: preg_replace(): The /e modifier is deprecated, use preg_replace_callback instead in ..../includes/class_bbcode.php on line 2968

Warning: preg_replace(): The /e modifier is deprecated, use preg_replace_callback instead in ..../includes/class_bbcode.php on line 2958

Warning: preg_replace(): The /e modifier is deprecated, use preg_replace_callback instead in ..../includes/class_bbcode.php on line 2958
4x4 Gantry kit - cable carrier install - Page 4
Bulltear Ad
Page 4 of 5 FirstFirst ... 2345 LastLast
Results 31 to 40 of 45

Thread: 4x4 Gantry kit - cable carrier install

  1. #31
    Helpfull BT forum member Captain
    Join Date
    Oct 2009
    Location
    Dartmouth, NS, Canada
    Posts
    53
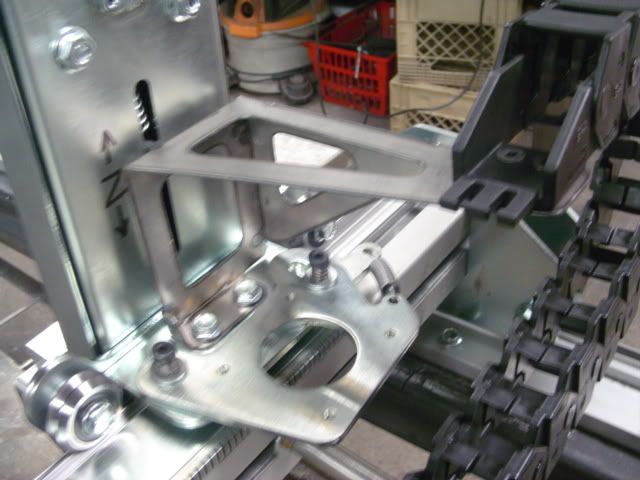
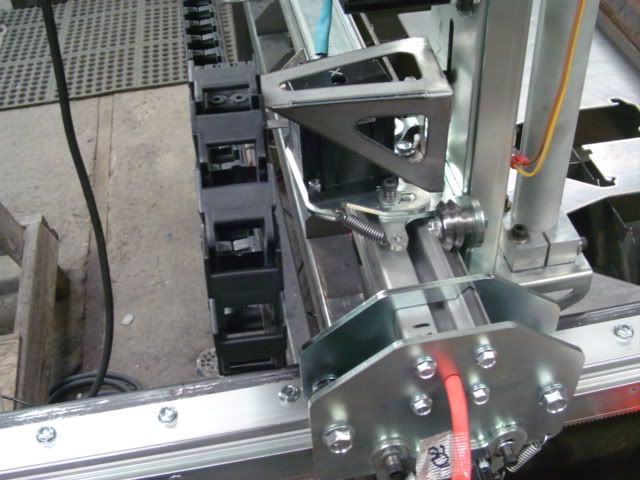
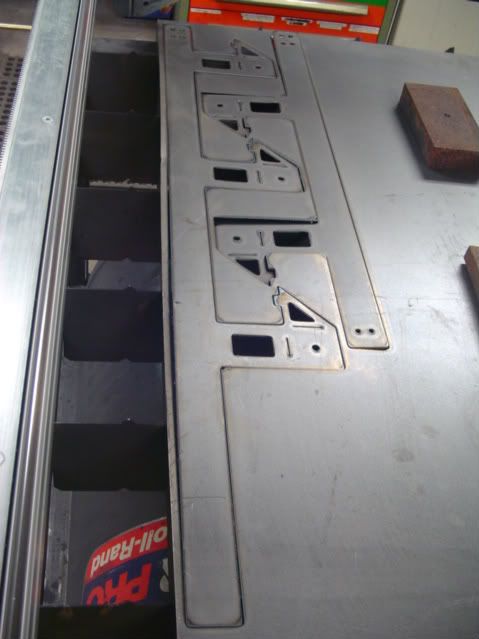
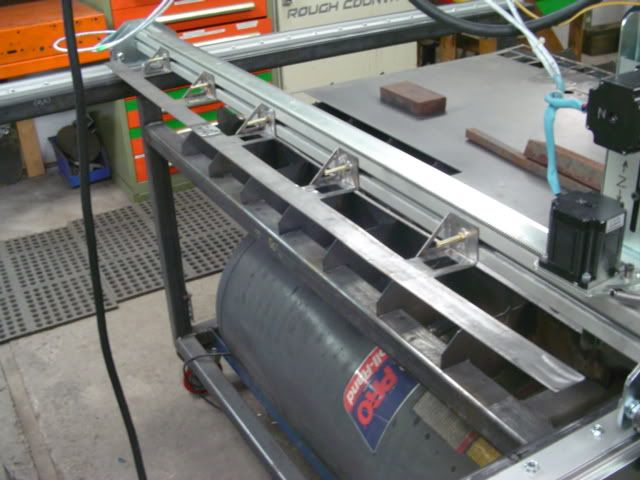
    Been making brackets for the cable carrier, the machine is reproducing. ;)

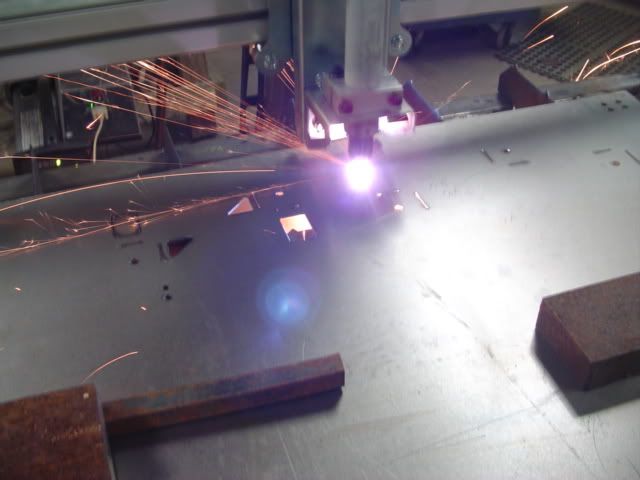
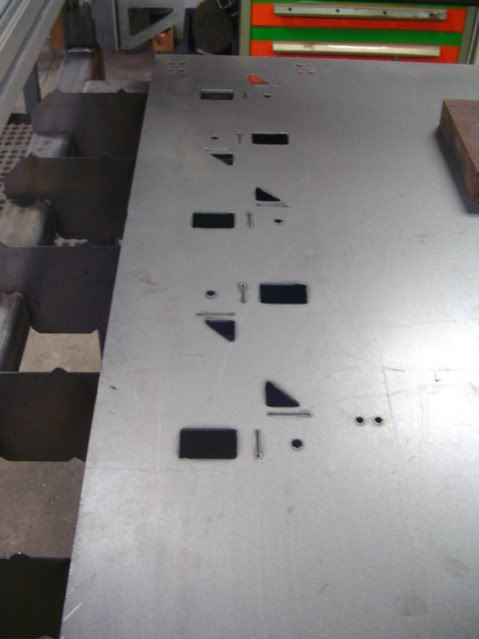
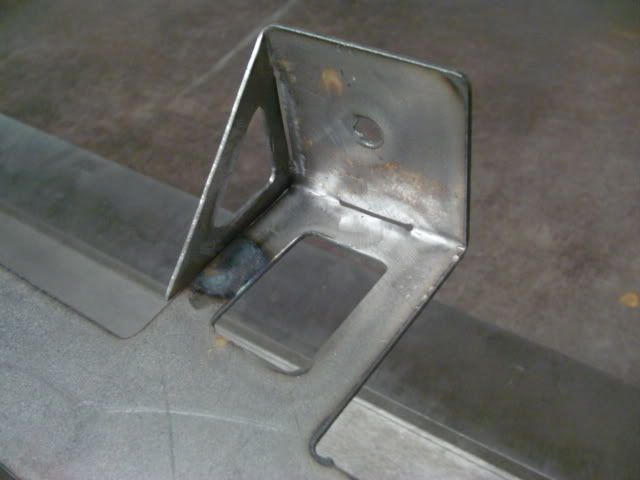
    its the raw steel one


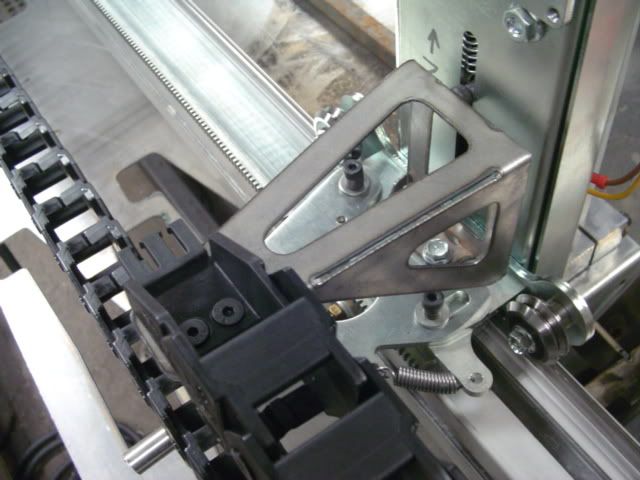
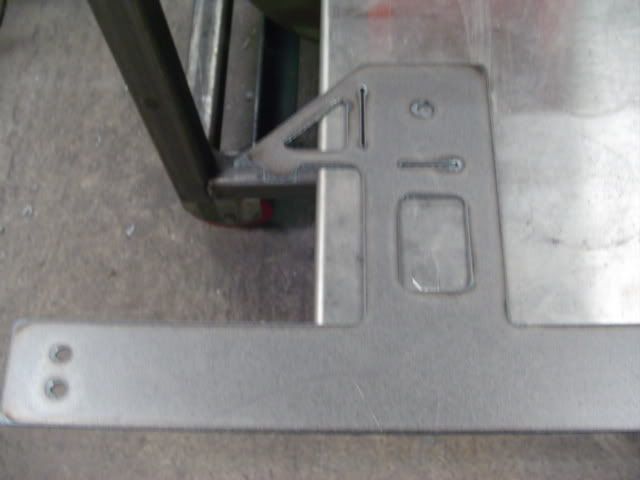
    complicated to wiggle around the 2 motors and stuff. motors removed for fit up.
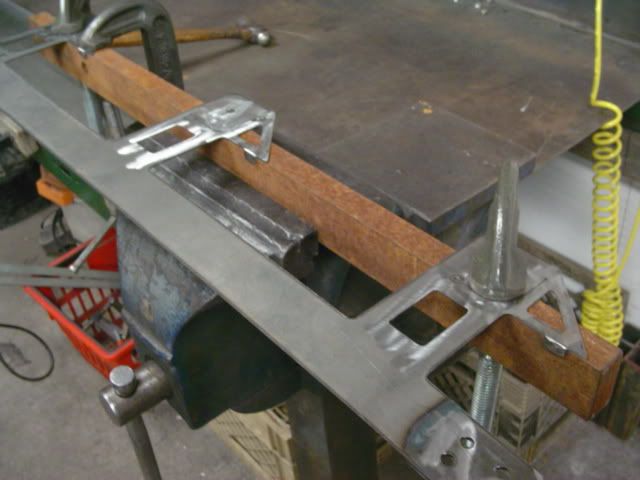


    bending it up


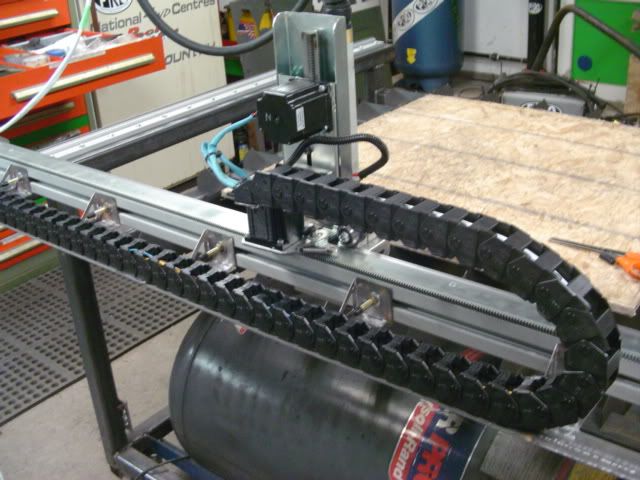
    you only have to run the carrier from the mid point of the travel, I bought a little extra to make the run right across.
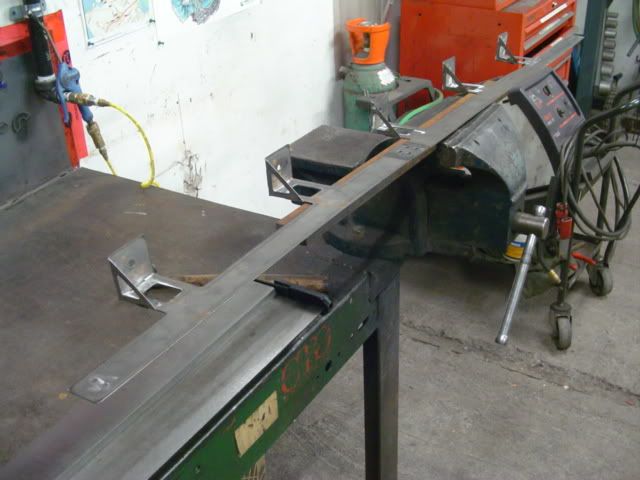
    It was $195CAD including $50 shipping, for 10' and two mount kits. not too bad, its high quality stuff, looks great and works really smooth.
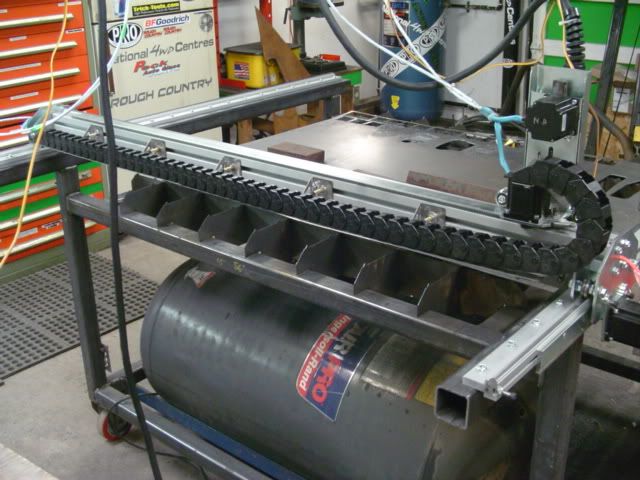


    wires all in


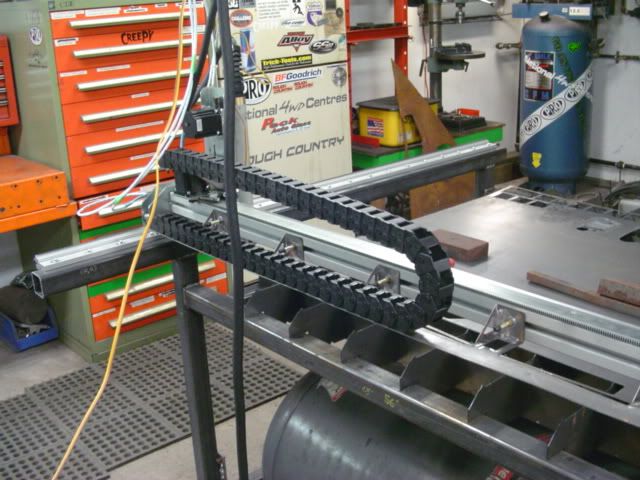
    Now I will move to the other axis and run a cable carrier down the side.

  2. #32
    Thank you from BT ULTIMUS MAXIMUS STATUS jeepsr4ever's Avatar
    Join Date
    Dec 2002
    Location
    Minnesota
    Posts
    10,042
    When we install a cable carrier we like to include the torch lead into it. You did an outstanding job on yours! Dont be afraid to run your table by the book. Check the other posts in this area for book speeds.
    [COLOR=#000000]
    Featuring www.StarLabCNC.com[/URL] for CNC plasma machines
    1-651-433-3689 TOLL FREE 1-855-433-3689

  3. #33
    Helpfull BT forum member Captain
    Join Date
    Oct 2009
    Location
    Dartmouth, NS, Canada
    Posts
    53
    The torch lead in with the motor wires is said to cause interference/noise and affect smooth operation of the motor, so I left it out. I have no experience with it, just what i was reading on-line and in the c&cnc manuals pertaining to grounding.

    there is room to jam it in there if I feel like it later, it would be so much cleaner looking...i don't like it out, going to have to make a boom.

  4. #34
    Helpfull BT forum member Captain
    Join Date
    Oct 2009
    Location
    Dartmouth, NS, Canada
    Posts
    53
    Still waiting for the water table, its really holding me up now.

    I can't mount the electronics to the table until i get the tray, so I've been working towards having everything ready to drop in place when the stainless water tray is done. The plasma and drives are mounted on the rear, the power supply and pc goes on the right side under the stainless desk.

    I finished the cable carriers tho, any wires you see out will be inside the skins.


    good shot of the 'no wires' hanging from the ceiling. Everything is run in the cable carrier, which follows the movements of the table. The wires are all locked in there, can't move.


    ripping up a 4x8 sheet to skin in the sides.


    skin with mounts holes, clearance hole for a bracket, and a spot for a couple of electrical fittings to pass the wires thru clean.


    detail of pass thru fitting.


    So I'm 1/2 building the table still, and half making parts while waiting. busy!

  5. #35
    Helpfull BT forum member Captain
    Join Date
    Oct 2009
    Location
    Dartmouth, NS, Canada
    Posts
    53
    Skipping ahead here a bunch - here is the first cut over water in the stainless tray. i have a bunch more build pics to get posted of the in between.

    I wound up putting the plasma torch line in the cable carriers after proving to myself it wouldn't mess up the THC or motors.

    Man, was the system ever picky about grounding before the DTHC would work. I pounded a 4' rod thru the floor into dirt and ran some booster cables from the table to the rod and the DTCH just started working like majic. Don't ignore the grounding! gantry, Z head, table chassis, plasma case all ground thru the floor post.

    as for the water table - Smoke is all but eliminated!!! The water is 2" deep, and 1/4" under the material. There is a 60G air pig laying underneath plumbed with a 1.5" drain to the table, and i'm going to put an air chuck and gate valve on it to raise/lower the level. which i don't anticipate having to do much. fawking rust......the tray, water and slats were beautiful on installation, so clean and clear. Overnite the slats rusted and the water is now brown for life. lol

    Just a few small things left, but its sooooo close to done!!

    vid ran out of memory b4 end of cut. ::)


  6. #36
    Thank you from BT ULTIMUS MAXIMUS STATUS jeepsr4ever's Avatar
    Join Date
    Dec 2002
    Location
    Minnesota
    Posts
    10,042
    We have a new water tray/slat system coming out for these tables with an adendum to the print. I cant seem to load your movie. Also what operating system are you using?
    [COLOR=#000000]
    Featuring www.StarLabCNC.com[/URL] for CNC plasma machines
    1-651-433-3689 TOLL FREE 1-855-433-3689

  7. #37
    Helpfull BT forum member Captain
    Join Date
    Oct 2009
    Location
    Dartmouth, NS, Canada
    Posts
    53
    movie is just on photobucket, it works for the guys on my forum. I'll check the privacy settings...its in the same folder as the previous vid tho, does that work for you?

    Operating system is Windows XP. no issues, runs good with SheetCAM TNG and Mach3 open and the machine running. That's all I have on the computer, its dedicated to the table.

    i'm gonna put AutoCAd on it and see if it is still ok, I've got a muddy path worn between the house pc and the shop to fix drawings with ye olde flash drive.

  8. #38
    Thank you from BT ULTIMUS MAXIMUS STATUS
    Join Date
    Feb 2003
    Location
    Back in VA for a while....
    Posts
    5,822
    Quote Originally Posted by Creepy
    as for the water table - Smoke is all but eliminated!!!
    Just a few small things left, but its sooooo close to done!!
    What were you cutting?
    " “It is said that men go mad in herds, and only come to their senses slowly, and one by one.." -Charles MacKay
    "'The trouble with our liberal friends is not that they're ignorant; it's just that they know so much that isn't so.' "
    -Ronald Reagan

    VOTE

  9. #39
    Helpfull BT forum member Swabie
    Join Date
    Feb 2010
    Posts
    38
    what size cable carriers did u get

  10. #40
    Helpfull BT forum member Captain
    Join Date
    Oct 2009
    Location
    Dartmouth, NS, Canada
    Posts
    53
    was cutting mild steel, 14G in the vid.

    I have read up on cutting aluminum over water if that is what you are getting at. My water system does not circulate water into the holding tank, there is a gate valve holding the water up in the tray. any hydrogen gas produced should dissipate into the air as I cut. There is no-where for the gas to be trapped, the slats run to the ends of the tray, so there can't even be a bit of gas trapped under the material. BUT - That being said, I am going to be very very careful the first few times I do aluminum!

    Cable carriers are about 1" square inside. Fits everything good on the gantry, but I didn't have room to run the plasma cable inside the carrier on the side of the machine where there are twice as many wires. I should have got something bigger for that side.

Posting Permissions

  • You may not post new threads
  • You may not post replies
  • You may not post attachments
  • You may not edit your posts
  •  
Bulltear Ad