Warning: preg_replace(): The /e modifier is deprecated, use preg_replace_callback instead in ..../includes/class_bbcode.php on line 2968
Warning: preg_replace(): The /e modifier is deprecated, use preg_replace_callback instead in ..../includes/class_bbcode.php on line 2958
Warning: preg_replace(): The /e modifier is deprecated, use preg_replace_callback instead in ..../includes/class_bbcode.php on line 2958 Mavs Build - Page 13
This happens if the two screws in front of the Z axis acme thread become loose or the Z axis gets a big jarring. Easy to fix but you will need to disassemble the Z halfway.
I tried to loosen the 3 bolts and the block still hangs. I guess i need to disassemble the z axis, it didnt get any jarring so what exactly do i need to do?
AutoCAD r14 its like 10 yrs old. Some dxfs I dl don't show up. I got it forto work a bit on my new 64 bit laptop but it still crashes if you click to many buttons to fast
Well its been awhile been busy working testing out ideas being lazy. But noticed the new machine kinda sad I didnt wait a little bit, but being realistic I dont wanna route, I just like the added beefyness off the sides and the Z mount. Ive become away that with a hand torch hanging off the old model any movement on it causes it to rock some its not very stiff or rigid, thus it makes it hard to get square, which isnt a big issue to me except when I was piercing holes in .060 alm it pierces at .080 hgt. and moves down to .040 and comes out oblonged. But that was asking to much trying to use the pierced hole as a finished hole size.
Another is I thing I got the height control to work with aluminum Diamond plate but for say 16ga, when you have alot of pierces and what not I think the way the machine is set up its not very capable. It works good if you have a long cut and it holds height well, but once the sheet warps its over. Because your next touch off it pushed the sheet down -- Zeroes -- moves back up while the sheet springs back -- pierces and its screws up the nozzle.
Now when I get a change Im gonna order some 2 1/4 slat material rather then my 2 1/2 so I can lower my sheet closer to the water. I dunno if 2 Inch will fit and dont think they have 2 1/8. I could get 2" and put 2 1/8 shims under neith = ). This way I can somehwat submerge thinner stuff that has a lot of detail and see if that helps. I havent noticed the water getting to warm it barely got hit when I Was cutting 3/4 a friend wanted to see if it could, I both pierced with ramping it in and edge started it, cut good the bevel and angle of the drag line at the bottom was severe but had almost no dross what so ever. But I was thinking what If I plumbed the water to feed into a radiator on the wall with a fan to blow the hot air as extra heat and to cool the water down... Id Imagine it would work if the thing ran nonstop, But I think I need to figure something out before it starts freezing so I can change my water out, its getting bad.
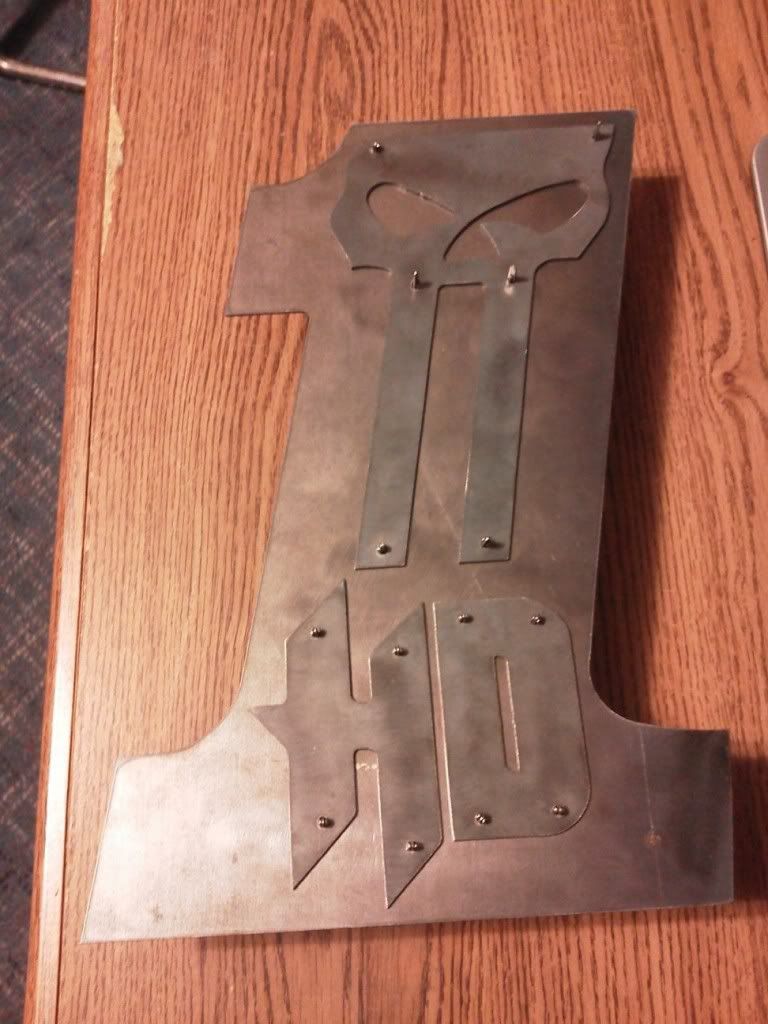
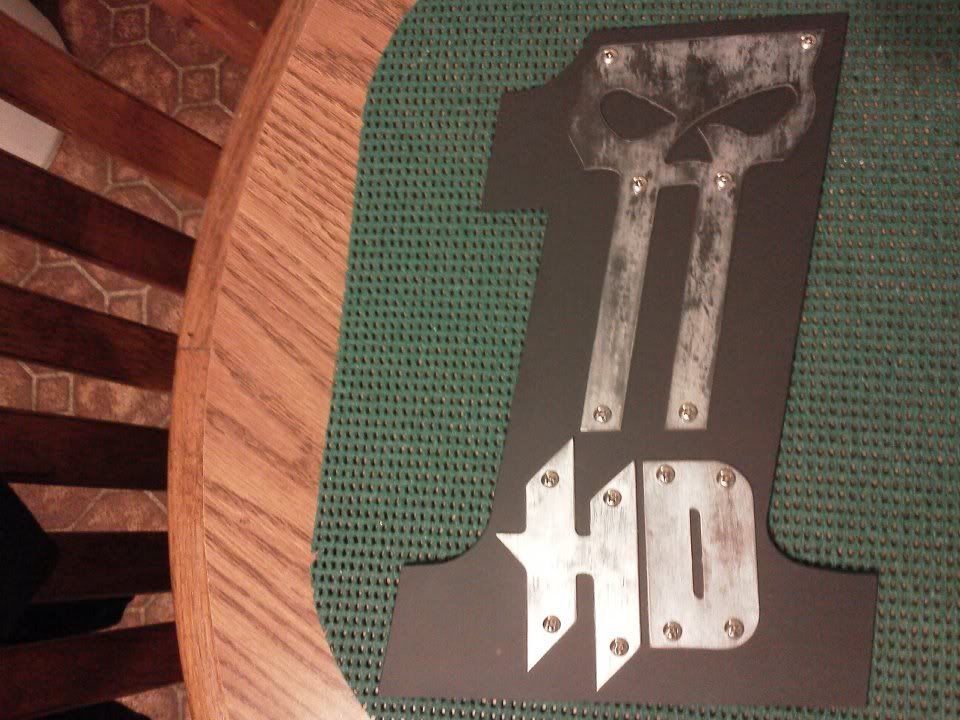
Heres Some stuff I cut yesterday wanted to make a sign to go with all my cars signs ive hung up, cut out a Hotwheels logo and made this. Its 12" high gonna powdercoat the 1 Black or Flat Black and polish chrome / orange / maybe engine turn the SKull and Letters. Gonna engine turn some test pcs today when I get some hardware.
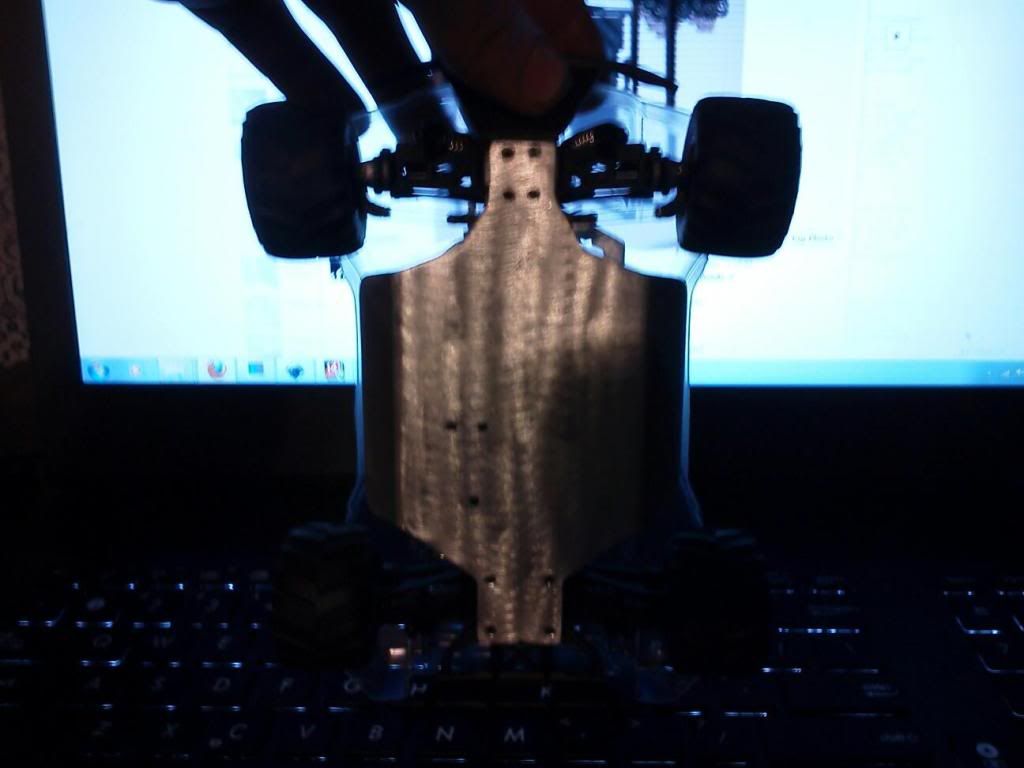
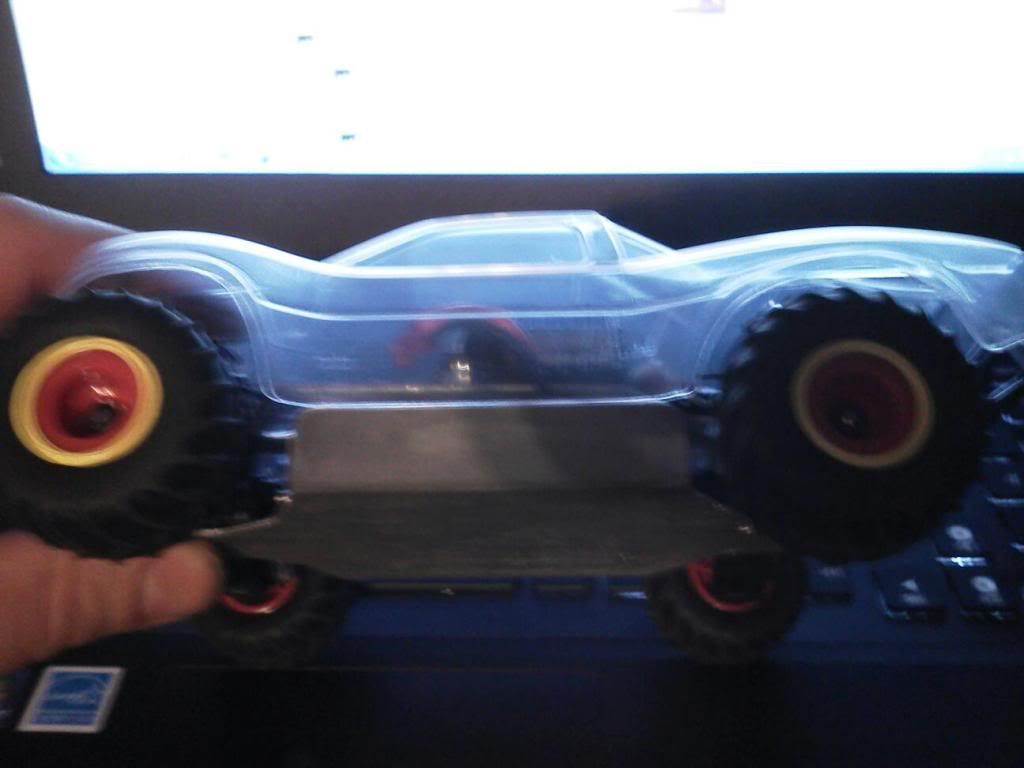
Heres what I was piercing the holes in, a 1/24 scale Rc truck, It didnt work to well so I drilled the holes by hand with a 1/16 bit. I layed out my first test piece and used it as a jig.
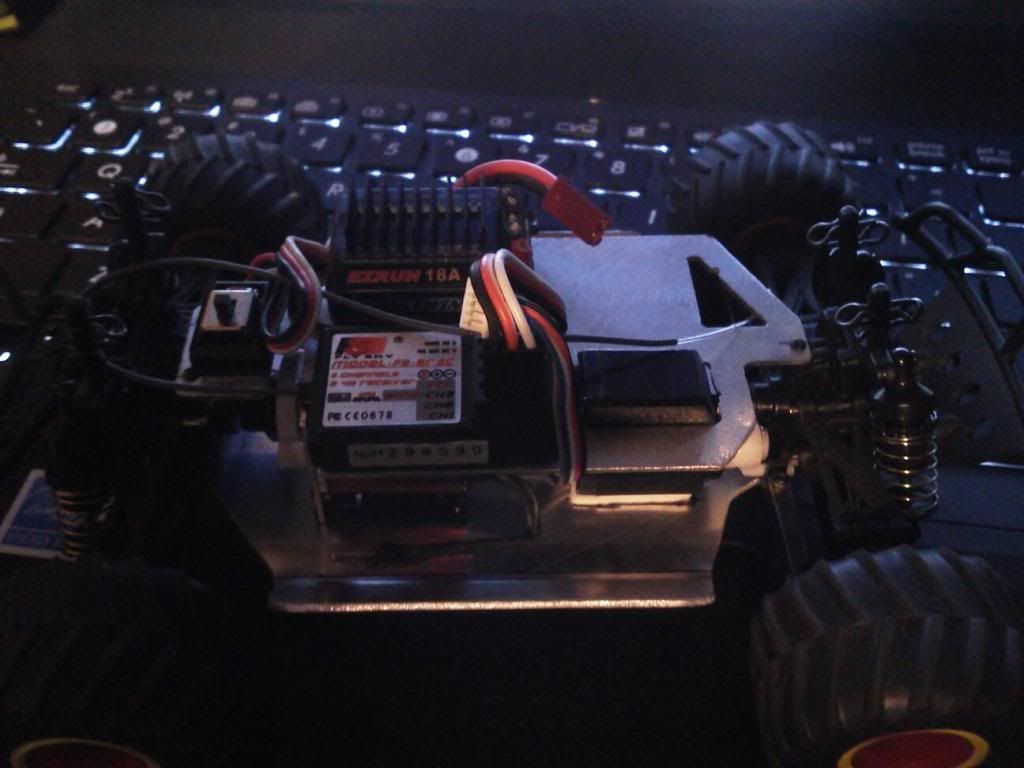
Made a top plate to, the stock radio equipment was junk AM stuff. so I needed more room to mount all the bigger electronics, as fast as the aluinum cut if I could just get the holes laid out or cut better, I could easily sell the 2 pc kit for 20+ bucks all day long on the RC forums.
Also made some Windspinners with Football team letters in them, Did a cool 5pointed spikey star, the things dangerous, Gonna do a 6 pointed more snow flakey one later. I got an order for 5 I gonna do, but 4 of them are inside a heart so I gotta draw that up today or tomorrow and get steel monday
Painted with 10-32 hardware, Flat black 1. Polish chrome on the skull and letters... looked like crap so I rinsed it off with water and was still tacky and stuck so I blew it off with air. let it set and then took an sos pad and rubbed it up and down, kinda did a semi brushed look. the skull is cleared the HD is not, I need to do it tomorrow, or maybe satin clear the whole thing
Im gonna make mine about 4' tall paint the letters gray first, then Wickeds favorite color ( Orange ) and do the sos pad trick.
I cut a tab in the back and tacked it on so you can hang it on a nail
Last edited by Mav68erick; 11-26-2011 at 10:18 AM.


 Posting Permissions

 Reply With Quote