Originally Posted by
Apocalypse Fabrication

1. I got the magnetic torch mount figured out...
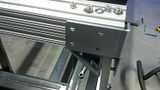
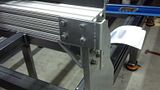
2. & 3. I think the reduction units (belt drives) were already installed on my motor plates... Can you verify from the pics that they are correct? Yes they look correct I did not see any flange nuts just the nylocs. Right, then your motor assemblies came fully assembled. The pictures should show what I have.
What do I do about gear contact? I assume the gears should be meshed fully, but is there a specified amount of preload I should put into the gears before fully tightening the nylocs? What should they be torqued to?
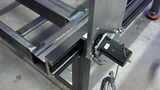
Side question: How the hell do you torque the bolts in the 45 degree gusset to 25 ft lbs? I can barely fit a wrench on the inside bolts, let alone a socket."Barely" and "can" are sometimes the same thing :) You will need to tighten those corner bolts with the open end wrench on the bottom bolts (of the gantry) and a socket on one side and a open end wrench on the sideplate upper bolts.


 Reply With Quote