Warning: preg_replace(): The /e modifier is deprecated, use preg_replace_callback instead in ..../includes/class_bbcode.php on line 2968
Warning: preg_replace(): The /e modifier is deprecated, use preg_replace_callback instead in ..../includes/class_bbcode.php on line 2958
Warning: preg_replace(): The /e modifier is deprecated, use preg_replace_callback instead in ..../includes/class_bbcode.php on line 2958
Warning: preg_replace(): The /e modifier is deprecated, use preg_replace_callback instead in ..../includes/class_bbcode.php on line 2958
Warning: preg_replace(): The /e modifier is deprecated, use preg_replace_callback instead in ..../includes/class_bbcode.php on line 2958
Warning: preg_replace(): The /e modifier is deprecated, use preg_replace_callback instead in ..../includes/class_bbcode.php on line 2958 4x8 Gantry Build... - Page 4
Helpfull BT forum member
Junior wrench of the Forum
Join Date
Sep 2012
Location
Coarsegold, CA
Posts
86
Ok, back from the hardware store on my lunch break... ROFL, that place is always a joke
They dont have stainless locknuts in fine thread, of course. The plated steel ones I got were 47 cents a piece. Tell the crate packing guys I will be sending them an invoice! :P
Helpfull BT forum member
Junior wrench of the Forum
Join Date
Sep 2012
Location
Coarsegold, CA
Posts
86
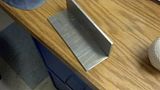
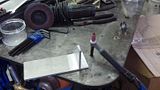
Got a couple of aluminum pieces cut 3x9 to make aluminum angle for the upper y axis cable carrier mount... All I have is a small scrap of 1/4" aluminum sheet, so I am trying to make do without having to go to the metal supplier in Fresno and get a piece of aluminum angle.
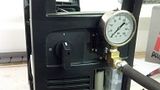
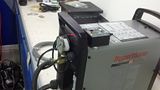
I'll fire up the Dynasty and see if I can weld these pieces together. Ive never done aluminum, and I dont have any filler (also in Fresno... 35 minutes away). Hopefully I can fusion weld it and it will hold. We will see...
Last edited by Apocalypse Fabrication; 11-16-2012 at 10:30 AM.
Helpfull BT forum member
Junior wrench of the Forum
Join Date
Sep 2012
Location
Coarsegold, CA
Posts
86
This weekend's progress:
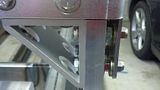
First, I needed to get the side plates shimmed and mounted with the reinforcement brackets. I measured and found that I needed .404 spacing on each side. I could have waited and made some bushings out of pipe, but I was trying to get this done. I put the longer 2" bolts in, a washer under the head of the bolt, a washer on the other side of the side plate, a nut, a washer, the reinforcement bracket, and then another washer and nut. It seemed to space it out enough to clear the bend in the bracket and everything lined up.
BTW... this wrench was the KEY for tightening all the bolts inside that stupid 90 degree gusset. It is a thin profile 1/2" wrench. The fullsize wrenches were all camming off the bolt head when tightened.
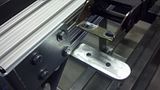
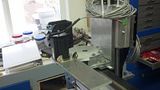
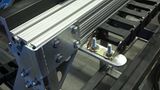
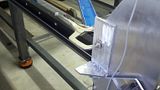
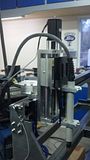
Installed the carrier pieces I had made previously for the gantry chain:
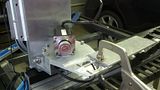
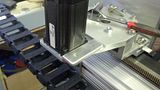
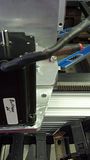
Mocking up the carrier end mounting plate for the gantry chain, I had to remove the x axis motor:
Bolted it together for mockup:
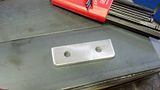
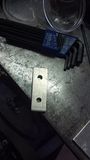
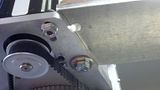
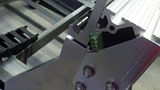
Carrier end mounting plate made from .25 aluminum:
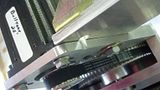
Here is a pic of the topside of the gantry carrier end mounted.
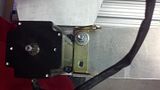
Just a little bit more meat on this motor bracket would have made life SO much easier:
Helpfull BT forum member
Junior wrench of the Forum
Join Date
Sep 2012
Location
Coarsegold, CA
Posts
86
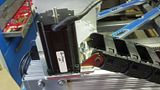
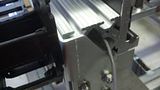
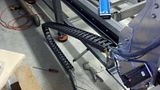
Here is a pic of the underside of the x axis motor and where the bolt and clearance required to mount the cable carrier end.
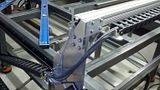
Pic of the completed gantry carrier mounting overall:
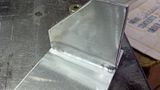
My first aluminum welding... used it for the Y axis bracket. It definitely isnt pretty, but it should hold this... I think ><
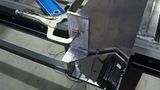
Drilling the holes through the side plate for the upper Y axis carrier end bracket:
Topside of the Y axis carrier end mounting:
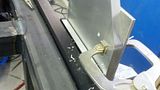
Here is an underside pic of the Y axis carrier end mounting.
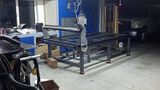
This is a mockup pic of the lower mounting of the y axis carrier chain... I still dont know what I am going to do here. I may cut a gusseted bracket out when the table is up and running!
I ran the wire for the motor opposite the carrier chain side through the extruded aluminum channel for the gantry:


 Posting Permissions

 Reply With Quote


