Warning: preg_replace(): The /e modifier is deprecated, use preg_replace_callback instead in ..../includes/class_bbcode.php on line 2958
Warning: preg_replace(): The /e modifier is deprecated, use preg_replace_callback instead in ..../includes/class_bbcode.php on line 2958
Warning: preg_replace(): The /e modifier is deprecated, use preg_replace_callback instead in ..../includes/class_bbcode.php on line 2958
Warning: preg_replace(): The /e modifier is deprecated, use preg_replace_callback instead in ..../includes/class_bbcode.php on line 2968
Warning: preg_replace(): The /e modifier is deprecated, use preg_replace_callback instead in ..../includes/class_bbcode.php on line 2958 4x8 Gantry Build...
Helpfull BT forum member
Junior wrench of the Forum
Join Date
Sep 2012
Location
Coarsegold, CA
Posts
86
4x8 Gantry Build...
I have been meaning to put this up for a while now. I would like to get suggestions and help from others that have been through the same process. I have read all of the builds here as well as other sites. Hopefully I have familiarized myself enough to get this up and working without much trouble!
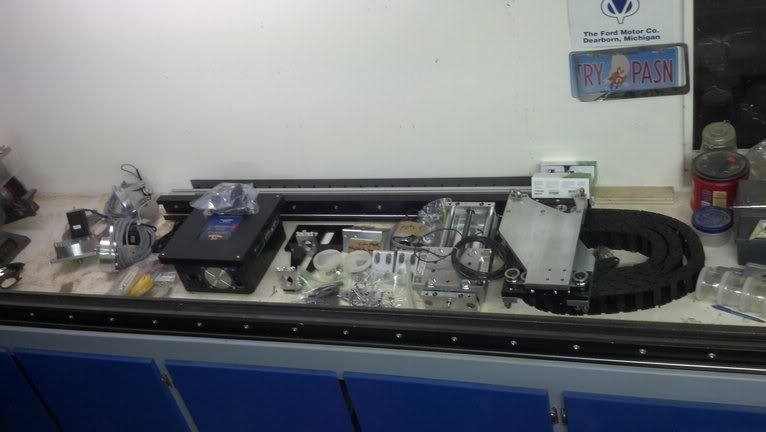
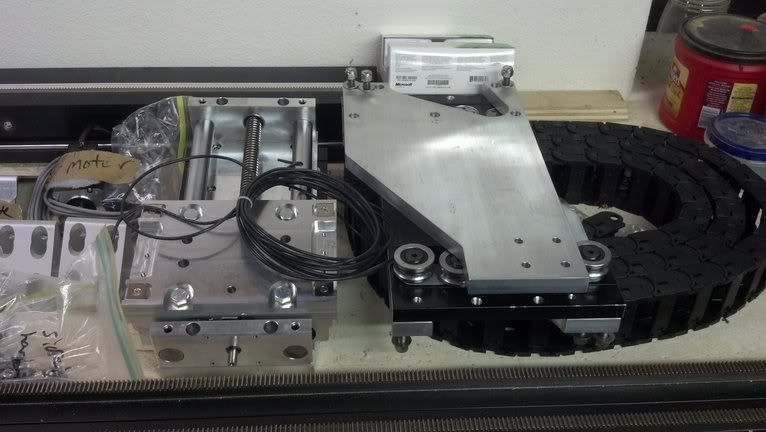
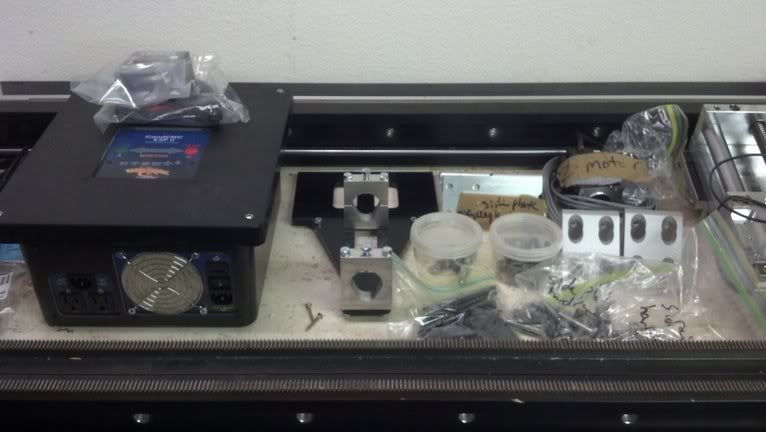
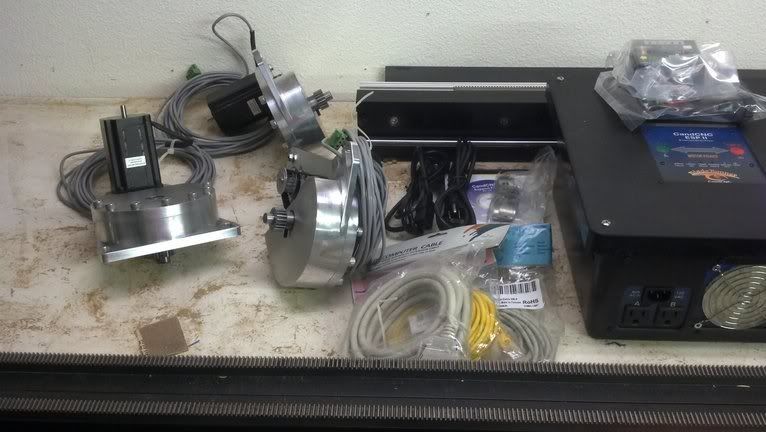
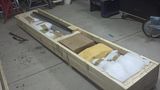
We received the gantry kit on October 24th and it came crated beautifully... Some of the washers and bolts didnt end up in baggies like the others, but I think I found them all...
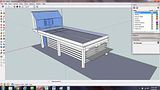
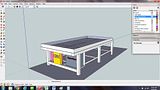
I used Matt's prints that he sent me a while ago and fabbed up a sketchup model that would be more customized to my needs. I will be putting this in a 24x24 garage and still parking my wife's car in there, so space is at a premium!
I have two renditions, since budget was a concern... we will be building the table in steps. Eventually it will look like this... possibly:
However, the first stage limits the steel rack, the desk and product drawers....
Eventually, the complete version will have a pressurized compartment for the electronics and dust filters to keep everything cool and clean.
Last edited by Apocalypse Fabrication; 11-09-2012 at 10:47 AM.
Helpfull BT forum member
Junior wrench of the Forum
Join Date
Sep 2012
Location
Coarsegold, CA
Posts
86
Bringing us up to date...
Bandsaw made the cuts nicely:
Pieces cut:
Easy way to cut slats... I chickened out going more than 8 at a time though:
I have been welding with my new Miller Dynasty 200 Tig. Please go easy on the weld quality; this is my first project and I am learning with every tungsten grind ><.
After wrestling with the fact that the concrete floor is no where near within 1/16" of flat... I put the table upside down up on the welding table that I made for myself previously... Finally a semi flat (we wont call it perfect, blanchard grinding is on my wishlist) surface.
After only 2-3 arguments with my loving wife... we got it squared, level, and plumb... well as close as a tape measure will tell you.
Legs came next:
I dont think this is the intended usage of pipe stands... but it worked well... dangerous, but well...
Flipping the table:
Last edited by Apocalypse Fabrication; 11-09-2012 at 10:47 AM.
Helpfull BT forum member
Junior wrench of the Forum
Join Date
Sep 2012
Location
Coarsegold, CA
Posts
86
How did everyone level the rails when mounting them to the sides? I have a digital Wixey level, 4 ft, 2 ft, and bullet levels. Do I need to get a couple 5-6 ft levels to be able to span the 55"?
If your table top is flat and your table is level then level it off the table top. After you start bolting the gantry to the side plates you have a decent allowance. You will be able to hear in the motor sounds if your off on one side and this is done by jogging the machine from front to back with either the keyboard or controller. This is one way the other way is with a levelling laser or a long level. The top base is the fastest way to do it.
Helpfull BT forum member
Junior wrench of the Forum
Join Date
Sep 2012
Location
Coarsegold, CA
Posts
86
Matt:
Should there be any paper instructions with the gantry kit? I thought it may be in bubble wrapped items, but I just opened everything and couldnt find any. I have looked through the forum here and I do see instructions listed around, but nothing that comes across as a coherent "start here" list?
Also, can I get a list of what should be included in the full gantry kit? I dont have a drill jig, bit, or tap? Wondering if I am missing these items or are they not included?
Next setup your software (we suggest using our settings for Mach 3 and Sheetcam) You can however find all kinds of quick tips on youtube (our videos will be up fairly soon)
Your support disk will also have valuable info on understanding your settings and if you stuck please dont hesitate to call we know these inside and out.
We also quit giving out the drill jig. The tap size is 5/16-18 and the drill size is .265 or close. It is BEST and EASIEST to use a transfer punch for centering the hole.
Here
Part # 3374A28 Mcmaster.com $2.85 21/64" transfer punch


 Reply With Quote